Here in zone 6a New England, the growing season is so short. By the end of November, trees have shed their leaves and plants have gone into hibernation mode. When the ground starts to freeze and the days become shorter, us gardeners turn to houseplants and planning next year's harvest.
Although that can be very enjoyable, I really wanted to try something new! I decided to try extending my growing season deep into the chilliest months. I grow vegetables and herbs during the summertime in a raised garden bed.

Adding a hoop house to this already built bed is rather inexpensive and relatively easy to maintain.
I spent some time doing research online and looking at some helpful books, and then dove right in! Although I am unsure at the moment of the amount of growing success I will have, I've decided to enjoy it and just give it a try.
This is the year for trial and error with a modest budget. If all I gain from this is knowledge, I will still be satisfied! Most of the materials and tools I used to build my winter garden can be found at East Coast Hardware.
Click here to buy supplies for your own winter garden

Building A Hoop House
My raised garden bed is 11 feet long and 5 feet wide. The hoop house consists of four 10 foot 1/2-inch PVC conduit. I purchased these at my local hardware store for $1.59 a piece.
PVC conduit is flexible and sturdy enough to prevent it from collapsing under the snow. Luckily, I did not have to cut or change the original size in any way. I then bent them into the position and shape I wanted. After adding the PVC conduit, I prepped my bed by adding new soil along with some fertilizer.

PVC Conduit Total Cost=$6.36

 When prepping my raised garden bed, I added some fresh new soil and some Happy Frog Fruit & Flower Fertilizer.
This mix contains bat guano, bone meal, kelp meal and feather meal! I want to give my seeds the best chance to sprout into strong plants while fighting against colder conditions.
I'm hoping with extra care and nutrition, it will give them that extra push. The wonderful thing about fertilizer is one bag can last you up to an entire year! It lasts a long time when you have a small sized garden!
Fertilizer Cost=$12.50

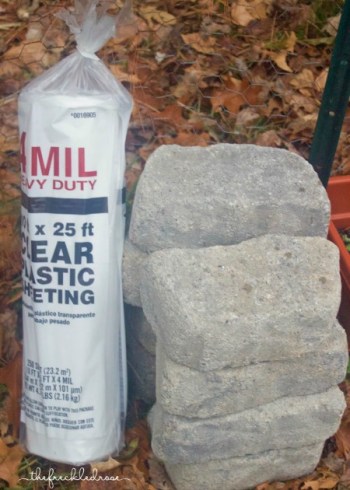
 I covered my newly built hoop house and baby seedlings in my raised garden bed with 4 MIL 10ft x 25ft clear plastic. I purchased this at my local hardware store for $11.47.
I did some adjusting and cutting to size so it fits snugly. I also purchased eight of these stone blocks for $2.28 a piece to hold it down and keep it from blowing away.
Nobody likes a rogue giant plastic tarp rolling through the neighborhood! I also have some duct tape on hand for any holes or rips that may occur during the harsh winter months. I may purchase an extra covering to have on hand.
Plastic Sheeting Cost=$11.47
Stone Block Total Cost=$18.24

Under The Hoop


Here is the winter garden bed with its new plastic covering. I will be closely monitoring the temps inside for the first week to see how warm it gets.
The weather really fluctuates here in New England. One day it's 30°F the next it's back up to 60°F. I'm using an outdoor thermometer to keep an eye on the temperature inside my hoop house.
Thermometer Cost=$5.98
I find the thermometer very helpful so far, and I am hoping my seeds sprout into vigorous, full grown plants.

So here is what it looks like on the inside of my winter garden hoop house. I planted many different greens, broccoli, cabbage, carrots, garlic, kale, leeks, onions, peas, radishes & turnips.

I found a great selection of cold tolerant vegetable seeds over at Baker Creek Heirloom Seed Company. It's also good that most of the vegetables I have chosen are shade tolerant. I know the sun isn't as prominent and strong during the winter months.

 Thanks to so many great suggestions from gardeners on Facebook and Twitter, I decided to add a floating garden blanket for extra protection. I purchased these Gardeneer by Dalen Harvest Guards 40 inch by 50 foot for $9.99 a piece.
I am only using one, but I purchased an extra to have on hand. These covers trap heat and moisture as well as protecting against frost. Since they are also good for keeping crops protected from insects and pests, I will be using these over my garden bed during the summer months as well. I can't wait to see if this extra layer of protection helps!
Garden Crop Cover Total=$19.98

Here are my seeds staying toasty under their new garden blanket! I have been monitoring my seeds growth, and now that I see some starting to sprout, I will be mulching in my bed this upcoming weekend. After I mulch it in with leaves from my yard, I will cover the mulching with the garden blanket again.

Total Winter Garden Cost=$64.54

Winter Crops
There are so many garden crops that grow well during the winter months. I took my time researching which vegetables thrive in the cold, and narrowed it down to a select group I was interested in.
Over on Plantsmap.com, I added a winter garden collection. Collections on Plantsmap allows you to keep track of the names of the plants you are growing, add photographs and also gives you a way to document and detail your growing experience.

If you wan't to see a full list of what I am growing, check out my collection here. These are some of the greens I have picked to grow in my vegetable garden.

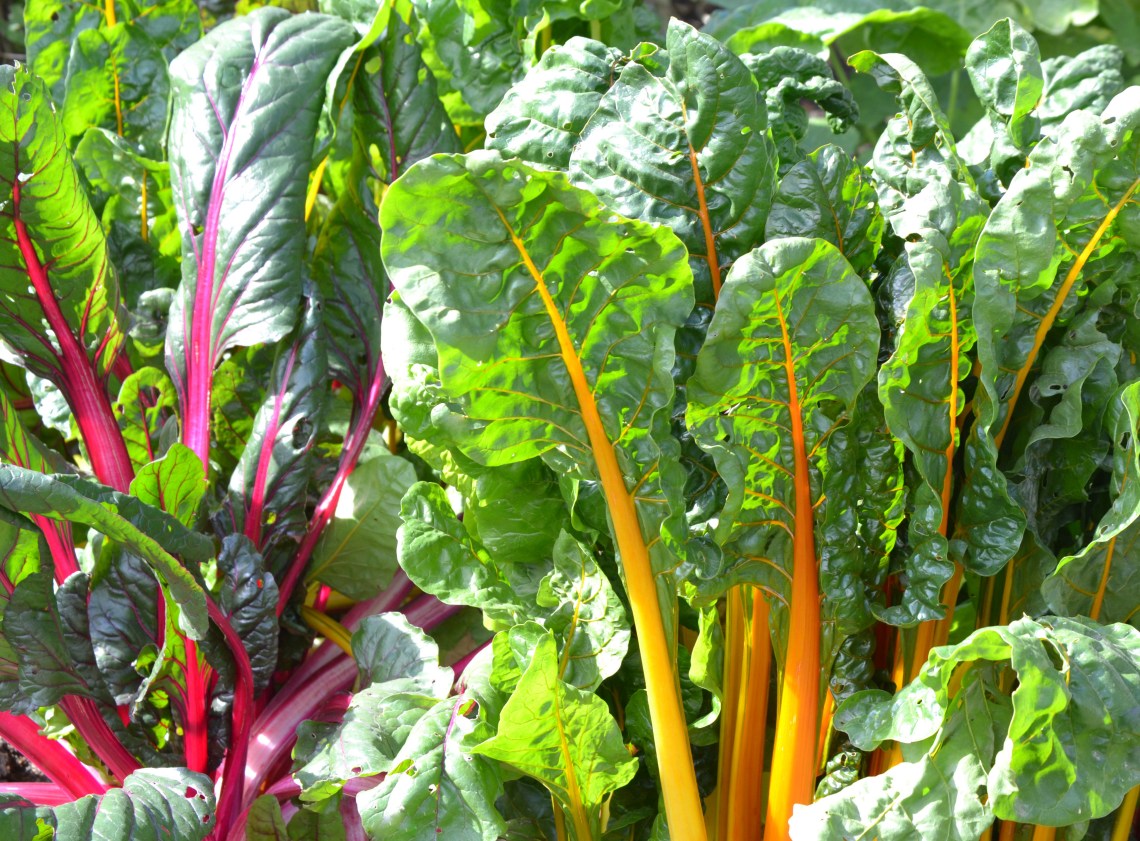
Arugula is one of my favorite greens with a spicy flavor. Fordhook Giant Swiss Chard has large, crinkled leaves with ivory colored stems.

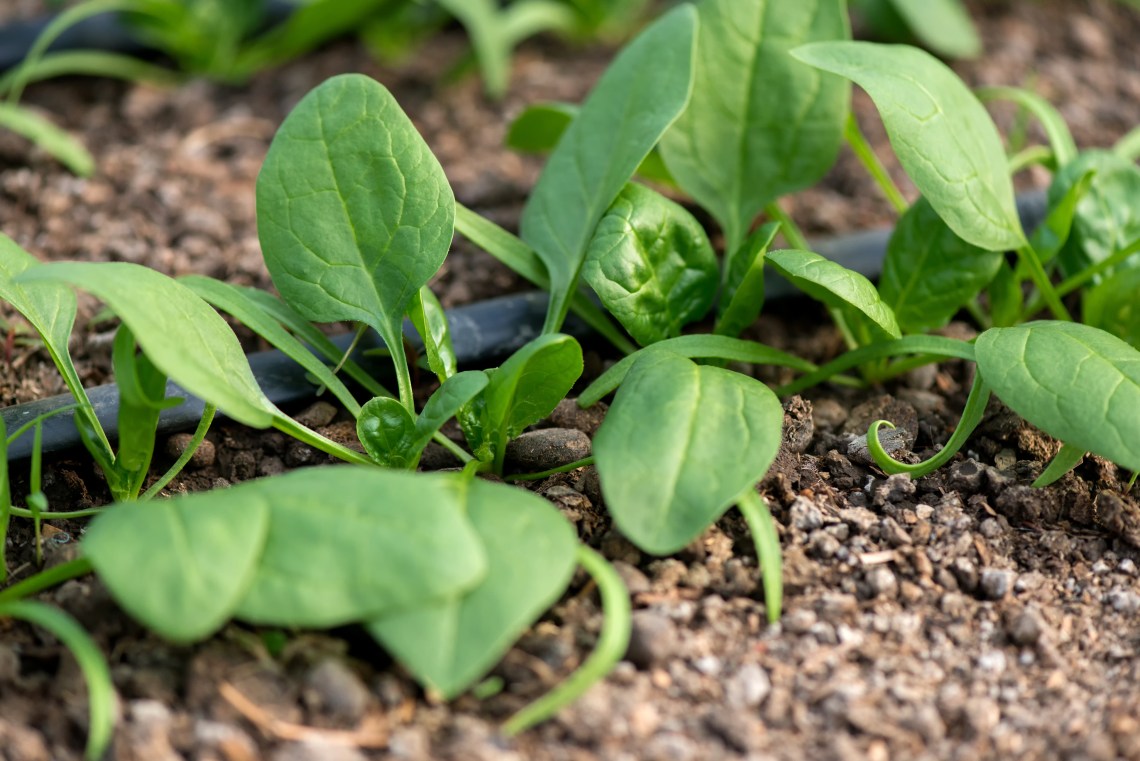
Amsterdam Prickly Seeded spinach is noted for being the hardiest of all the varieties. The sturdy plants have flat, tender leaves with red tinged stalks. All of these greens are known to do well in colder temperatures.

Above are more greens otherwise known as "other greens" I am growing in my winter garden. Morris Heading Collards have dark green leaves and is a variety that is slow to bolt.

Corn Salad produces flavorful, deep green leaves & is fairly cold-hardy. Miner's Lettuce has a spinach like texture with mild tasting leaves.

Learning & Growing
Building a winter garden has been a great learning experience for me. I've received so many helpful suggestions to make it even more successful! I am definitely going to be mulching it in to see if that helps trap in heat.
I also want add mulch to help with the moisture level. Since it can get really humid under the tarp, with less sun in the winter it is the perfect environment for mold to grow. I'm hoping to defend against that by not overwatering and also adding dry material to the soil.

I am going to be adding one more piece of PVC conduit across the top to add more support and to help prevent problems with the future piles of heavy snow. When it does snow, I will be going out regularly to clean off the top to prevent it from collapsing under the strain of the weight.
I have also heard that adding Christmas lights to the inside of the hoop house can prevent plants from freezing, so I may give that a try.
Right now I am reading The Year-Round Vegetable Gardener by Niki Jabbour. It is such a great book full of helpful content!
Garden friends have suggested I look into reading The Winter Harvest Handbook by Eliot Coleman, who just happens to be from New England as well! I'm hoping to purchase this soon for some helpful reading material.

Do you extend your outdoor growing season into the fall and winter months? What are some tips you have heard or have tried to ward off frost and a hard freeze? Please share with me in the comment section below.
Although I don't mind if Snow Miser brings us a white Christmas, I'm trying to prevent his friend Jack Frost from getting anywhere near my precious veggies. Check back soon to see update from my endeavors into the exciting world of winter gardening!

If you enjoyed reading this post, you might also like these:
• Vegetables to Plant in the Winter Garden


71 Comments
Nikki Wayne
November 24, 2020 at 3:51 amSo great to read about your garden. Those cauliflowers looks so nice.Great job.
Danielle
November 23, 2020 at 10:45 pmWow! This is awesome. Although I must say, the crops covered in snow does make them look so fresh and beautiful. Makes me smile!
Bri
November 23, 2020 at 9:40 pmI just started a little gardening this year and I love it! This is great to keep those fresh veggies coming throughout the winter!
Natalie
November 23, 2020 at 9:12 pmThese are fantastic tips! Unfortunately for me, living up north means crops wouldn’t survive as we get early frost and winters are super cold here 🙁
Heather
November 23, 2020 at 8:45 pmOur weather doesn’t get super cold here, so we don’t have to worry about the climate change affecting our garden, luckily.
monica y
November 23, 2020 at 8:31 pmI would had never thought about growing vegetables during the winter, what a great idea
Heather
November 23, 2020 at 7:35 pmIt snow so much here I’m always hesitant to try growing a winter garden. These are some great tips to help.
melissa chapman
November 23, 2020 at 5:49 pmThat winter garden is such a fun idea and I never knew that up north you could grow in winter. I would love some fresh greens in winter
Brianne
November 23, 2020 at 5:43 pmOh wow. I didn’t even know you could garden in the winter. That is super cool! I’d love to do this.
Pam Wattenbarger
November 23, 2020 at 5:20 pmWe were just sitting here planning out our winter garden. We’re in zone 7b or 8a depending so we rarely have snow or frozen ground. It does make it easier to plant things.
Amber Myers
November 23, 2020 at 4:52 pmThese are some helpful tips. I wish I could grow stuff period. But I know lots of people who are able to grow veggies all year long.
Carol
November 19, 2016 at 8:24 pmFantastic! I pinned and shared your post.
Greg
October 30, 2016 at 1:52 pmYou could sturdy up that hoop house by adding another piece of conduit along the top to maintain the frame structure. I love the idea of adding manure pails to get the heat. I’ve heard of doing that with wood waste too, tree branches or brush that have gone through a wood chipper.
Chris
October 30, 2016 at 10:55 amSeveral years ago, I got my tomatoes in waaaayyy late. My bushes weren’t full of tomatoes until late September and were still too small so I decided to extend my year by adding a hoop tent but I also strung old Christmas tree lights around it as well. These were just the thing to add a little bit of warmth when I needed it. We had fried green tomatoes for Thanksgiving and Christmas that year.
wp.me
April 14, 2016 at 5:07 pmAn outstanding share! I’ve just forwarded this onto a colleague who was doing a little research on this.
And he in fact bought me lunch due to the fact that I discovered it for him…
lol. So allow me to reword this…. Thank YOU for the meal!!
But yeah, thanx for spending some time to discuss this topic here on your blog.